Table of Contents
Recently I had the opportunity to build a small application that needed to authenticate and authorize a user using Google’s sign-in mechanism, and requests on their behalf data from a Google API.
I choose to implement this as a Cloudflare Worker as a serverless compute service leveraging Cloudflare key-value storage (KV) for session storage. The tooling from Cloudflare (wrangler) has evolved nicely since my first attempt at Cloudflare Workers, so I thought it was a high time that I gave it another try.
As any good software engineer would, I started searching for any repository I could use a template to wire up Google OAuth easily. But I failed to find anything that would play nicely with Cloudflare Web worker, or had some proper documentation/tests, or had a decent quality to it. So in this blog post (and in the companion GitHub repository jazcarate/cloudflare-worker-google-oauth), I want to document, explain and go over some interesting decisions so someone just like me would have this to springboard their development.
That being said, feel free to yoink any or all of the code from the repo.
Implementing Google OAuth
Result
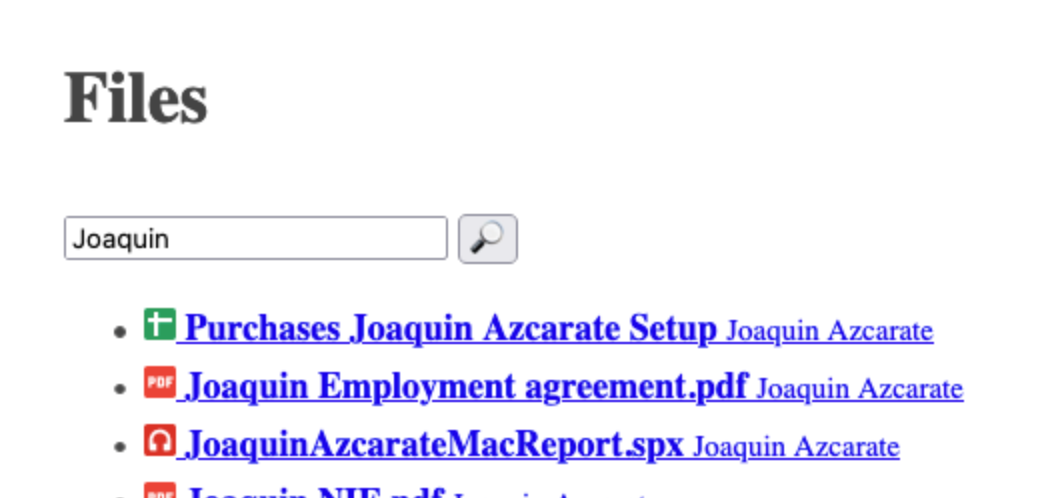
First of all, this is what we’ll develop: An app that can display and filter a user’s Drive files; and provide a link to them.

I choose Google’s Drive listing API as an excuse. Everything we’ll see from now on can be easily changed to use any of the myriad of Google APIs, as they all require roughly the same authentication and setup.
Structure and Systems
To decouple the logic from external sources (such as Google), the project is best understood as a slim entry point index.ts, the core business logic in the handling method (handler.ts), and every external dependency in the lib/ folder.
The main interface from handler.ts is a function that injects all the systems
export default function (
  kv: KVSystem,
  google: GoogleSystem,
  env: EnvSystem,
  crypto: CryptoSystem,
): (event: FetchEvent) => Promise<Response> {
  const { remove, get, save } = kv
  const { tokenExchange, removeToken, listDriveFiles } = google
  const { isLocal, now } = env
  const { generateAuth } = crypto
  //...
This not only helps separate concerns but allows us to mock external dependencies in the tests.
Initial request
Once we have all systems initialized, we do match if the request is an /auth callback. We’ll come back to this section later. If the request is not a callback, then I check if the user is authenticated. There are several ways in which a user might not be.
Like if they don’t present any cookies.
const cookies = request.headers.get('Cookie')
if (!cookies) return login(env, google, url)
Or if they have cookies, but not the one we care (auth)
const auth = findCookie(AUTH_COOKIE, cookies)
if (!auth) return login(env, google, url)
Or the KV does not have an entry for that auth cookie (either because it has expired, or that the client is malicious and trying to guess)
const token = await get(auth)
if (!token) return login(env, google, url)
Authenticated
After this point, I know that the user is authenticated. This means I have access to their token to query Google API.
So now I need to choose one of three paths:
- f it is to the root (
/) - If the request is to
/logout - or any other path.
Of note, this is just the pathname, it does not include search params like ?q=foo; so the URL /?q=foo .pathname is just '/'
switch (url.pathname) {
    case '/':       // ...
    case '/logout': // ...
    default:        // ...
}
List files
If the request is to the root, then I query Google API with the Authorization token like the API expects
async function listDriveFiles(
  accessToken: string,
  query: string | null,
): Promise<DriveFiles> {
  const url = new URL('https://www.googleapis.com/drive/v2/files')
  if (query) url.searchParams.append('q', `title contains '${query}'`)

  const response = await fetch(url.toString(), {
    headers: { Authorization: `Bearer ${accessToken}` },
  })
  /// ...
}
If the fetch returns something, I check the body for errors and panic if needed
const resp = await response.json()
if (resp.error) throw new Error(JSON.stringify(resp.error))
Once Google answers a list of files, then it is just a matter of rendering them. I decided to keep the rendering simple, and inline the whole HTML; but this can be easily adapted to return a JSON, or use a proper template engine. I’ll leave this as an exercise for the reader.
Logout
In the logout case, we revoke the token with google, we remove the auth from the KV and we reply to the client with a deleted cookie.
event.waitUntil(Promise.allSettled([removeToken(token), remove(auth)]))

return new Response('Loged out', {
    headers: setCookie('deleted', EXPIRED),
})
I leverage the waitUntil lifecycle to respond to the client immediately, and call google and remove the KV in the background. And I use allSettled as I don’t particularly care if the KV couldn’t be deleted, or if Google had trouble removing the token as there is not much more I would be able to do.
Not found
Otherwise, I simply return a status 404 Not Found.
return new Response('Not found', { status: 404 })Callback
Going back to the /auth request; this needs no authentication (as we are in the process of creating it). So I just check for the contract that Google sign-in documents. The query params has no errors
const error = url.searchParams.get('error')
if (error !== null)
    return new Response(`Google OAuth error: [${error}]`, { status: 400 })
And it has a code
const code = url.searchParams.get('code')
if (code === null)
    return new Response(`Bad auth callback (no 'code')`, { status: 400 })
If so, we can exchange the code for a proper token via another Google API
const response = await fetch('https://oauth2.googleapis.com/token', {
    method: 'POST',
    headers: {
        'Content-Type': 'application/x-www-form-urlencoded',
    },
    body,
})
and again check for errors
const resp = await response.json()
if (resp.error) throw new Error(resp.error)
With a valid Google access_token in hand, we generate a random string for the application’s authentication
const newAuth = generateAuth()And store in the KV the way to translate from newAuth to access_token
await save(
    newAuth,
    tokenResponse.access_token,
    //...
)
Finally, we send the client back to wherever they came from, with their new authentication cookie. We stored the original URL in the state param that Google OAuth allows us to send.
return redirect(
    '/' + decodeURIComponent(url.searchParams.get('state') || ''),
    setCookie(newAuth, new Date(expiration)),
)
Other systems
The systems in the lib/ folder are quite straightforward, and can be divided into two subgroups conceptually:
Cloudflare enhanced dependencies
As this application is running in Cloudflare Workers (both the real environment in the cloud and the dev environment generated by npm run dev), some variables are injected into the global scope. These variables are typed in the bindings.d.ts file; and are generated by steps 2 and 3 from README.md#Setup wrangler.
- KV module uses the global
authTokensvariable that Cloudflare Worker injects into the worker. More information about how KV work can be found here. - Env module keeps the environment injectable. Even though we could use the global variables (
CLIENT_IDandCLIENT_SECRET) injected to the web worker, this approach allows me to test thehandlerwithout having to re-wire global variables; that is a pain.
Utils
And some other systems that are not Cloudflare Worker dependant, but more like utility functions, grouped by their specific domain.
- http module has some utils to parse the Cookies header format and build a
302 Redirectresponse. - Google module has a types API using just
fetch. - Crypto module is a small utility to use the
cryptoAPI to generate a secure-random string.
If all this is too complicated; you can try out our Identity Management Solution – VYou which was developed by Apiumhub software developers.


