Table of Contents
As assistant chatbots are becoming more and more useful, accurate and predictable, it’s no surprise that they are gaining in popularity. They can guide customers, suggest actions, act as an interactive FAQ and even help onboard new employees to internal applications for enterprises. What does it take to develop one on Azure, then? In the following post, we will dive headfirst into the new Bot Framework Composer v2 from Microsoft and create a simple Bot, while checking out some of the Composer’s most popular features and capabilities.
What is the Bot Framework Composer?
The Bot Framework Composer is an IDE built on top of Microsoft’s Bot Framework SDK, aiming to provide a powerful, yet intuitive tool to develop and deploy bots at a faster pace. It’s flow-like designer is easy to understand and get started with, while the aspect of customizability does not feel compromised – the source code, be it C# or JavaScript, can be edited and expanded directly.
While the Composer was available ever since late 2019, in 2021 its 2.0 version shipped, bringing quite a lot of new functionalities to the table, which might even convince developers, who perhaps found the previous iterations of the Composer’s capabilities lacking, to give it another go.
Of course, it is still possible to build bots directly with the SDK, without relying on the Composer.
Setting up our project
After installing the app, we can opt to use a template to kickstart our project:
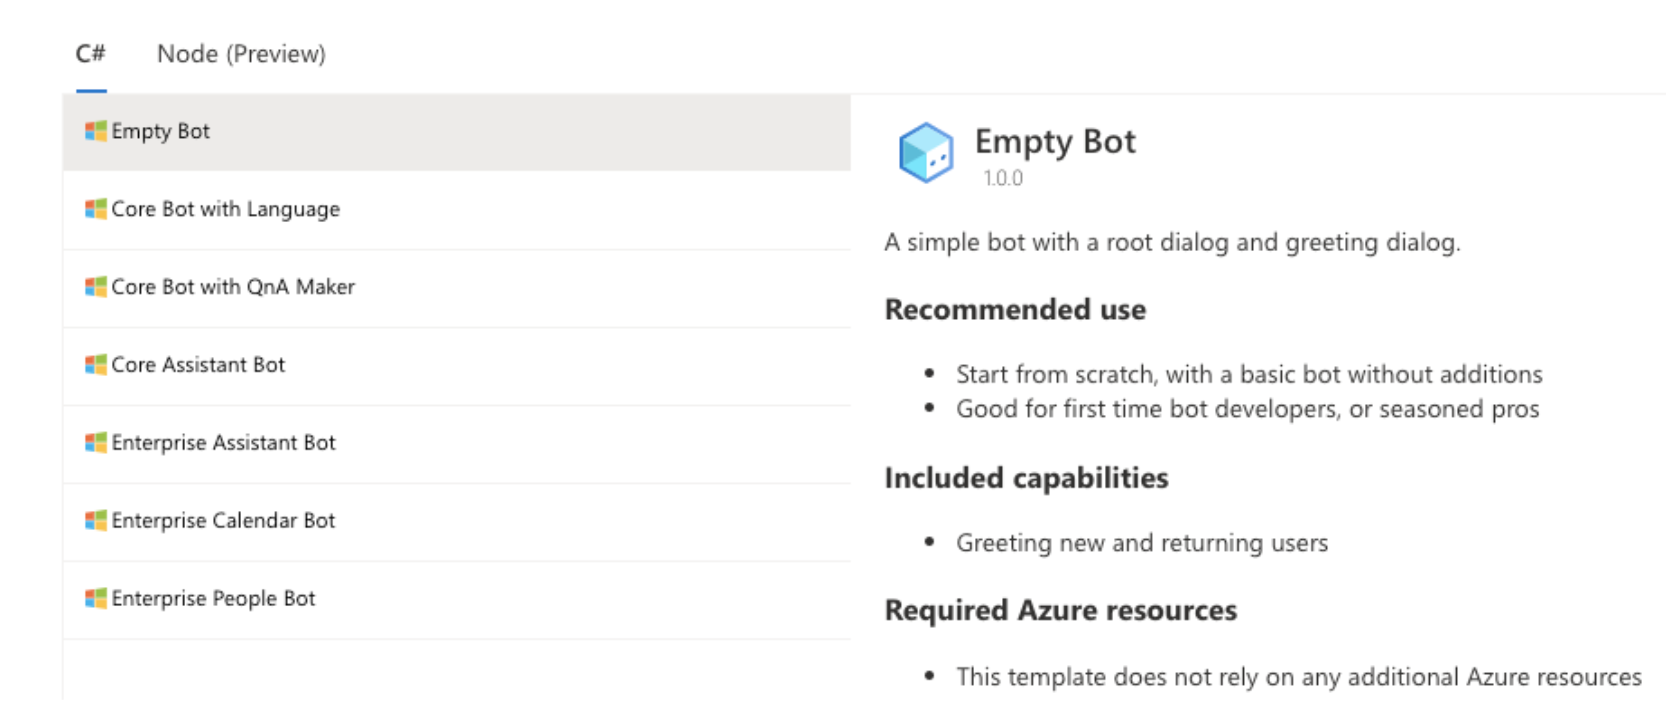
For our purposes, the Empty Bot template will be sufficient, however, choosing a more feature-full template can save valuable time if our goal was to build a bot for production usage. Going down the list, each template can do the same as the previous, only adding capabilities on top – the Enterprise templates even integrate with Office 365 and Active Directory via the Graph API.
Other than the Empty Bot, every template requires some additional Azure resources to be provisioned, be it a Language Cognitive Service or QnA Maker (although for demo and exploratory purposes, free tiers are available).
After selecting a template, we will also need to specify the runtime of our Bot – be it an App Service or Azure Functions.
Building blocks of a Bot
Before we actually start to build up our Bot, we have to understand the basics of the components that make up a Bot.
The main entry point of our Bot is a Dialog. There is always one single main dialog, however we can build any number of additional child dialogs (or opt to put all of our logic inside the main dialog). Each dialog can be viewed as a container of independent functionality. As the complexity of our Bot increases, more and more child dialogs will be added – for real-world, more sophisticated Bots, having hundreds of dialogs is not rare.
Each dialog contains one or more handlers, called Triggers. A trigger has a condition and a list of Actions to execute, whenever the defined condition is met. A trigger can be when the Bot recognizes the user’s intent, an event on its dialog (lifecycle events), activities (eg. user joined, user is typing) and so on. Of course, there’s various kinds of actions we could take, maybe we want to call an external API, set some internal properties/variables from the currently logged in user, ask follow-up questions, or just reply with a simple text.
Creating our first interactions
It’s quite reasonable to expect our Bot to greet us, when we first open its chat window. This is an activity (user joined) on our main dialog, therefore we’ll add a new trigger on the main dialog:

The Composer will then ask us to specify the type of this trigger (Activities) and then the exact activity type on which we’d like to trigger on (Greeting).
Out of the box, a flow is generated with a loop and if statement, containing some default values:
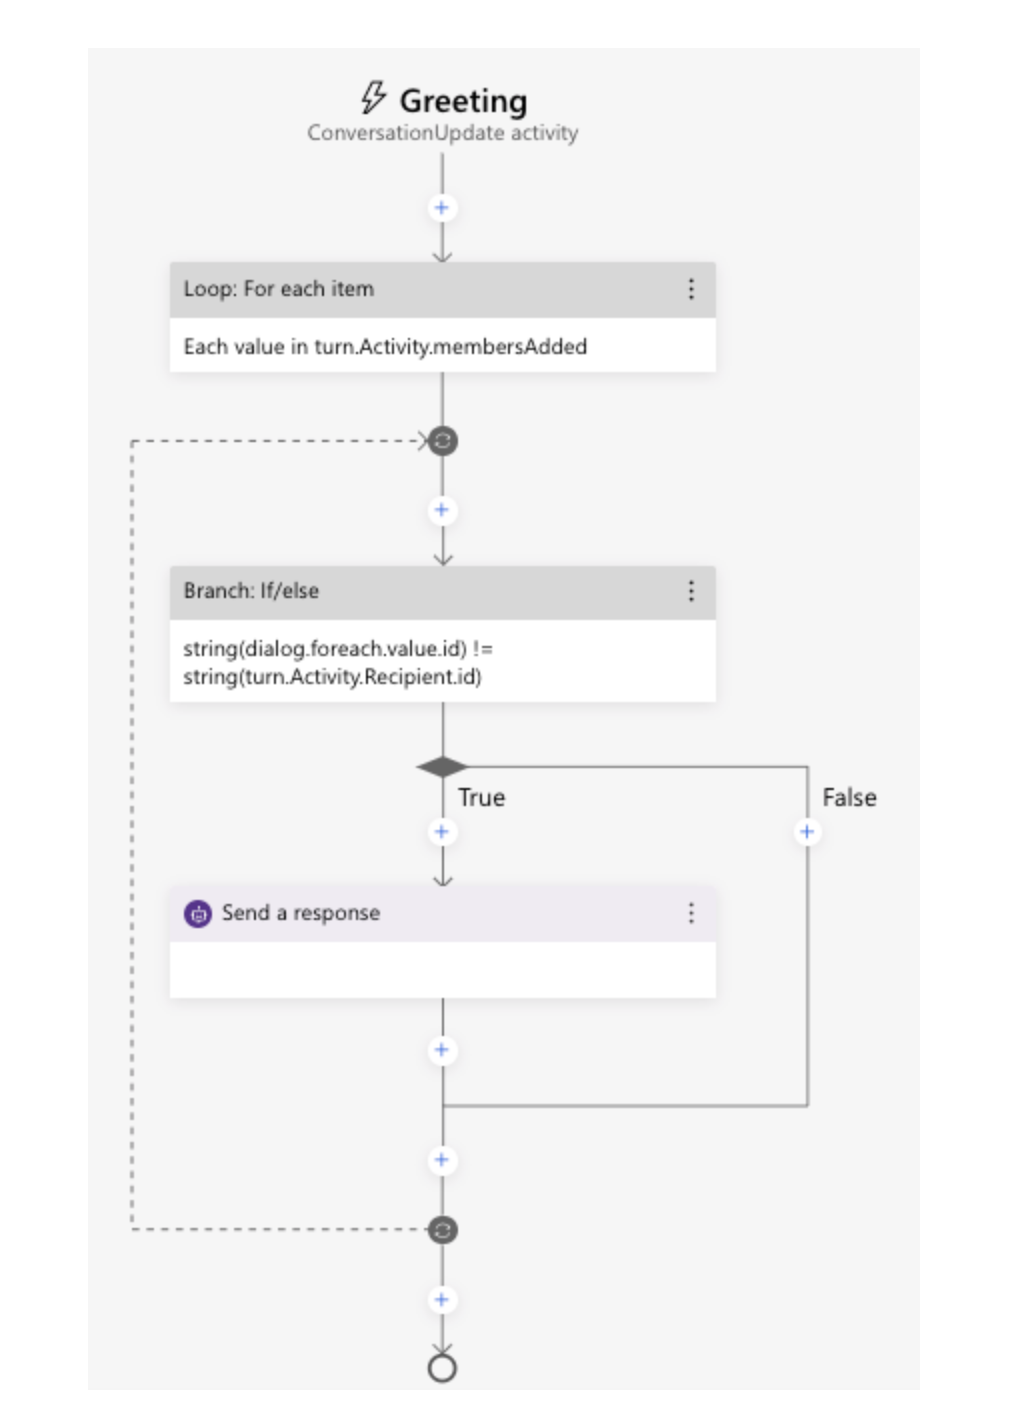
While it might look a bit more complicated than expected (after all, we just want to send a ‘Hi’ message), there’s not much going on here, only housekeeping. We want to focus on the ‘Send a response’ card, where we can define the message the Bot should greet each user with. To make our Bot a bit more exciting, we can add a few alternatives, out of which the Bot will randomly pick one:
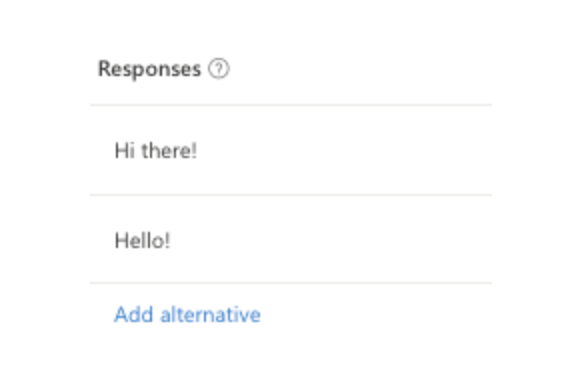
By default, our Bot’s sole language will be English, however, if we were to navigate to our source files, we’d see that under the hood, the Composer saved our templates with an identification to their language, such as BotDemo.en-us.lg. In the settings, we can add new languages, which would generate a copy of the .lg files where we can customize the responses accordingly.
Running the Bot, the Direct Line protocol
The Composer app ships with an integrated runtime manager with which we can run our Bot on localhost. To actually communicate with the Bot, we can choose to use the also-integrated Web Chat, however, it’s reliability as of today might not be not as good as running locally an instance of the Bot Framework Emulator.

The reason why we potentially have to install another app just to run the Bot locally is the communication protocol it uses under the hood: Direct Line (or Direct Line Speech), a standard HTTPS protocol. For the sake of technical accuracy, the Emulator actually uses the JavaScript client for Direct Line, which is also used by the Web Chat. The Web Chat is a fairly customizable way to integrate Bots into existing frontend applications – it even offers a component for React.
After we connected to the Bot, as expected, it greets us:
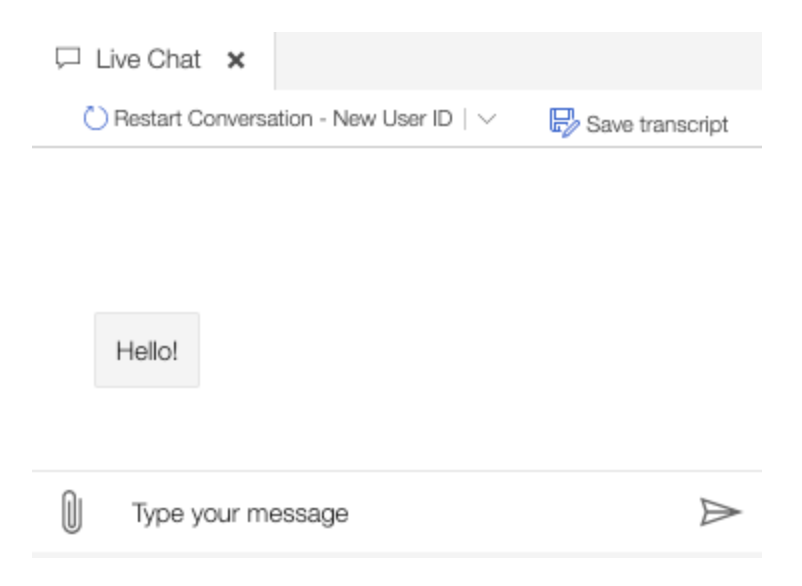
To validate that the bot does switch its greeting randomly, we can restart the conversation and eventually see our alternative greeting of ‘Hi there!’.
Expressions, Functions, Language Generation
Perhaps we want to greet our user more formally, with a ‘Good morning’, ‘Good afternoon’ or ‘Good evening’. To do so, we will need to evaluate an expression to determine the current time of day, then switch between the responses, depending on the current hour.
We have access to an array of pre-built functions, out of which, we will need two: utcNow, in order to get the current date and time, as well as getTimeOfDay, which expects a timestamp as its parameter and returns either ‘morning’, ‘afternoon’, ‘evening’, ‘night’ or ‘midnight’. Since we will only need three out these values, we’ll have to process a little bit further our response.
For more complex responses, it’s a good idea to extract the logic from the ‘Send response’ step out into the ‘Bot Responses’ section and edit them directly there.
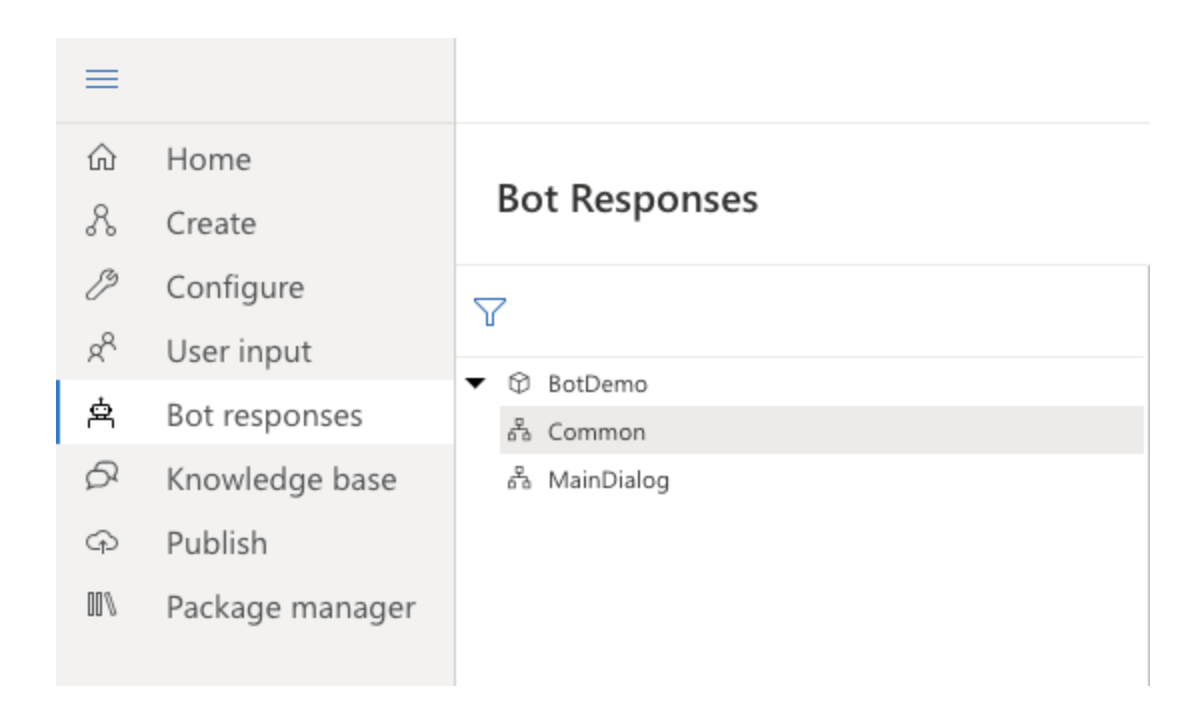
In order to access dynamic/built-in variables and functions, we will use string interpolation: if we put ${utcNow()} as our value, the Bot will evaluate it first and respond with the output.
We can now define an if statement to only respond with our three greetings as such:
- IF: ${getTimeOfDay(utcNow()) == 'morning'}
   - Good morning!
- ELSEIF: ${getTimeOfDay(utcNow()) == 'afternoon'}
   - Good afternoon!
- ELSE:
   - Good evening!
Lastly, we just have to make sure our ‘Send response’ step returns our new template’s value: just delete the hardcoded values from before and use the Bot icon – all templates in scope will be selectable:
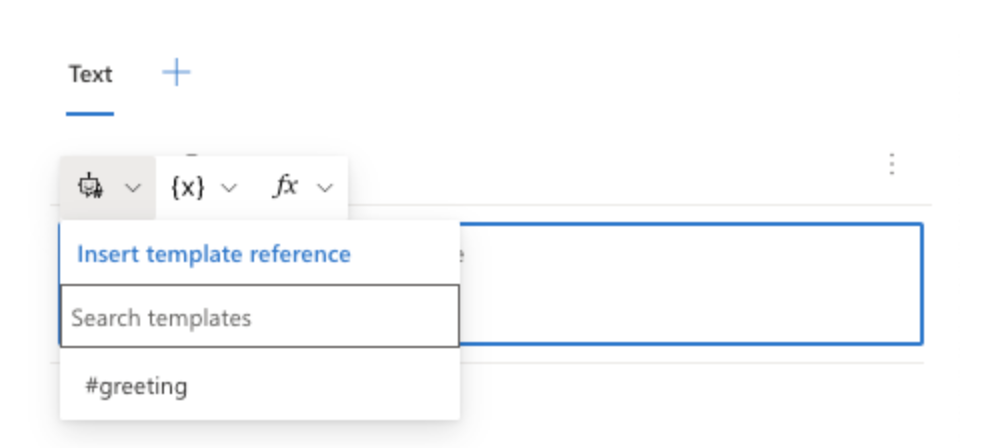
The editor also has a decent syntax highlighter, making it fairly easy to write even more complex templates: functions can be combined, parameters can be passed along and so forth, as we’ll see later.
Suggested Action Buttons, Cards
Alongside a text response, we can send additional elements with our reply, most commonly used to enhance it with suggestions, buttons or follow-up options.
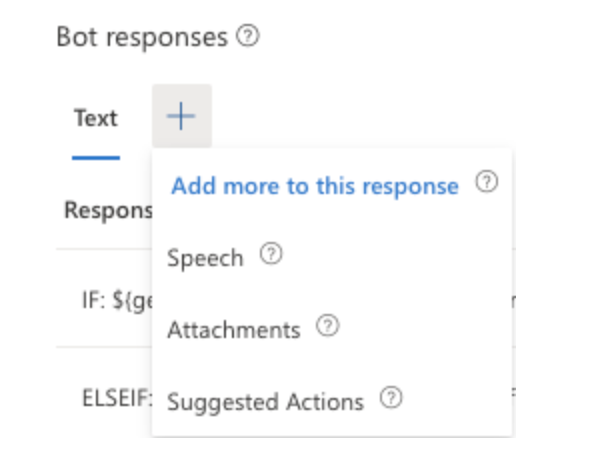
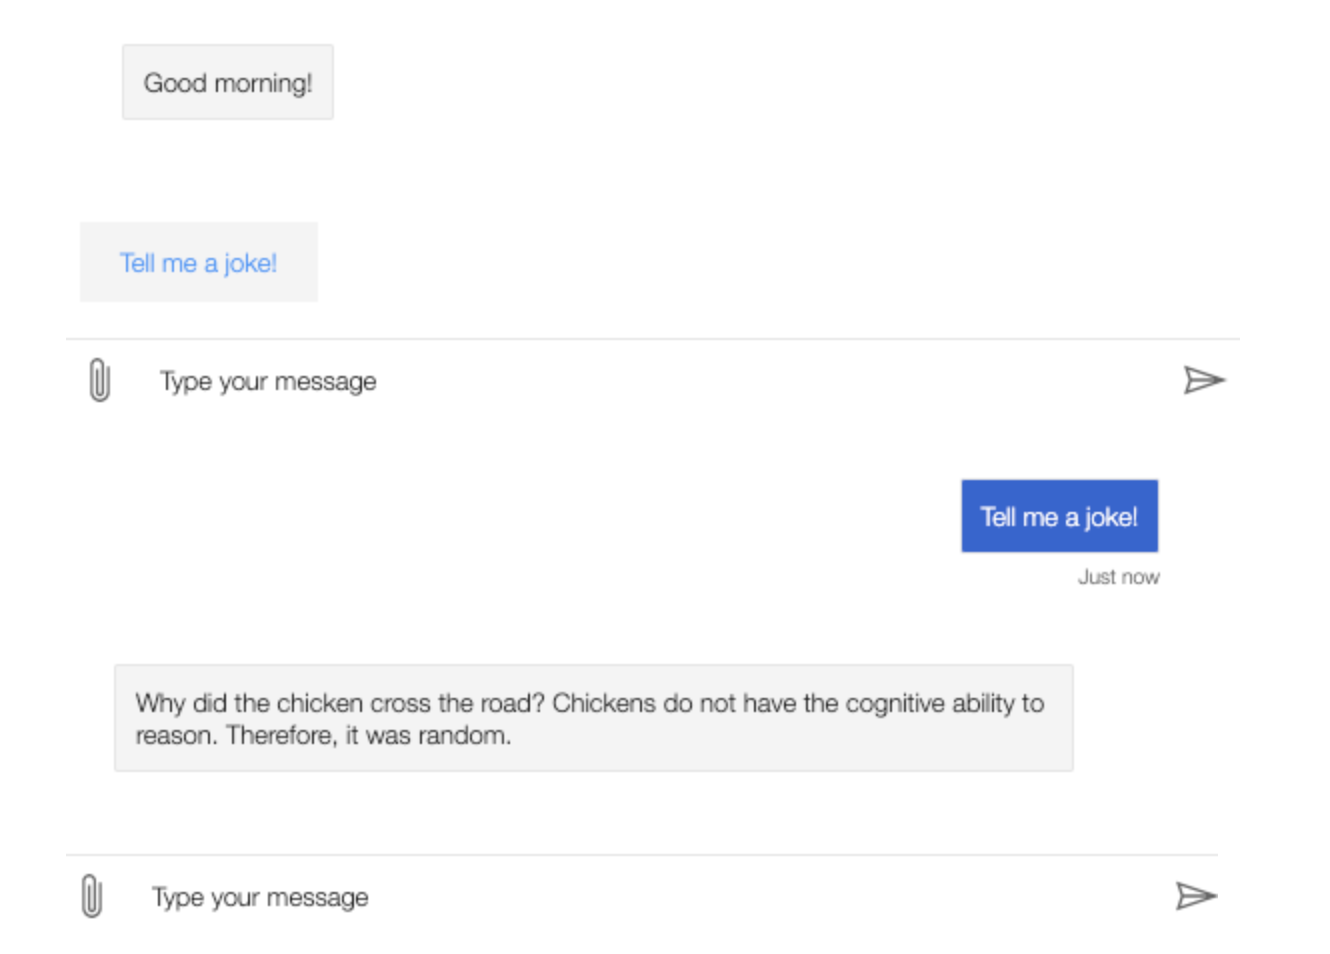
The simplest form is a suggested action. On the UI, it will be rendered as a separate, clickable bubble which will trigger a different action – for our case, let’s just put ‘Tell me a joke!’ as the text for the suggested action. In order to actually reply with a joke, we will have to make our bot recognize and interpret the incoming text of ‘Tell me a joke!’ from the user – on our main dialog, we can select either the Default, Regular Expression or Custom type for its recognizer. For our case, the regex one will suffice.
After this configuration, we can create our new trigger, which will be based on user intent this time, where the RegEx pattern should match to our ‘Tell me a joke!’ suggestion text.
As for the actions under the new trigger, another ‘Send response’ will be necessary, with our joke of choice – this is all it takes to create and handle suggestions.
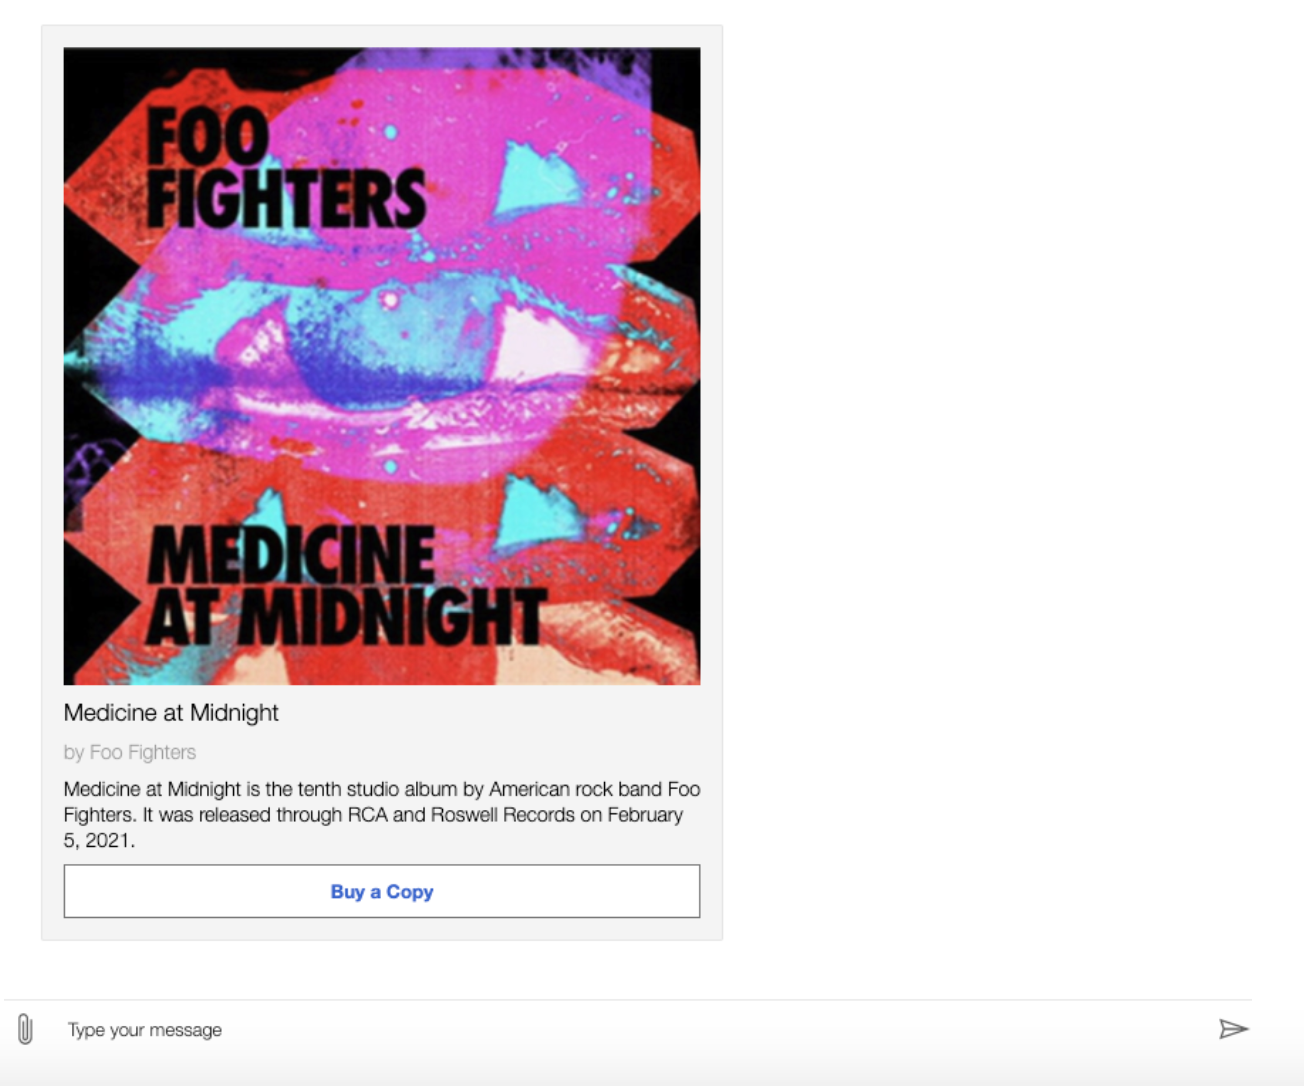
Alongside suggestion buttons, we can also attach cards with our text answer, be it for asking the user to sign in somewhere, a thumbnail, audio or video. A good use case for cards could be if the user was searching for products: if the intent is recognized, returning more details with follow up actions on the product would be a better user experience, rather than just returning a link:
[HeroCard
title = Medicine at Midnight
subtitle = by Foo Fighters
text = Medicine at Midnight is the tenth studio album by American rock band Foo Fighters. It was released through RCA and Roswell Records on February 5, 2021.
images = https://upload.wikimedia.org/wikipedia/en/thumb/2/2f/Medicine_at_Midnight.jpeg/1000px-Medicine_at_Midnight.jpeg
buttons = Buy a Copy
]
Consume an external API
In the real world, calling one or more APIs would probably be a requirement quite early on. For our purposes, when the user asks for the most popular books at the moment, we’ll call The New York Times’s Books API to fetch the top five best selling young adult books.
In a new trigger on a new and recognized user intent, we can choose the ‘Send an HTTP request’ step:
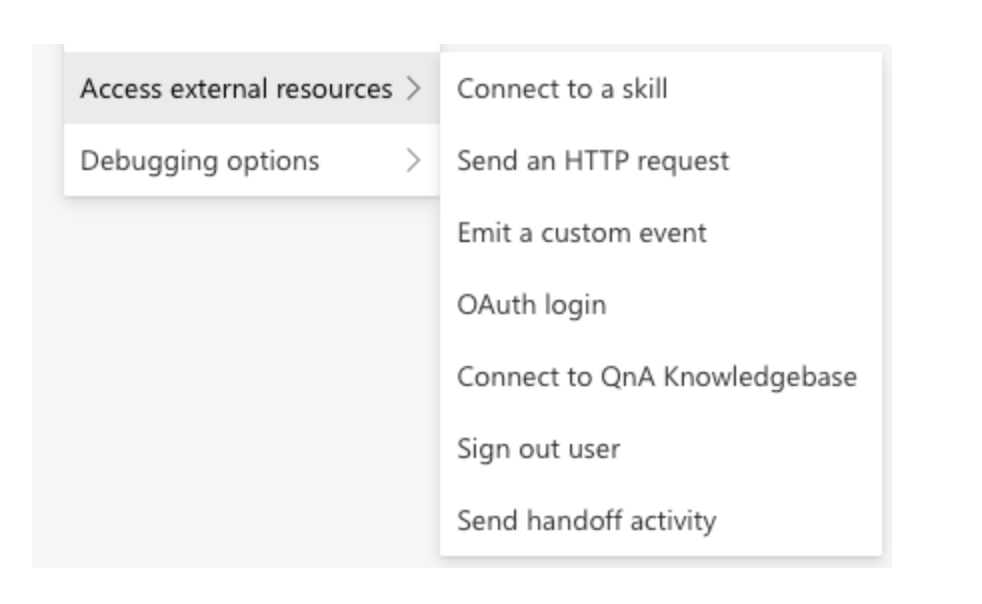
It’s worth noting here the OAuth login option: should the external API require it, that option would provide a Login button to the user to sign in beforehand.
If we were to call other services in our Azure subscription, authentication could have been done through managed identities or service principals after we deploy our Bot.
Since the NYTimes API uses an api key, it’s not necessary for us to configure anything further, other than making sure not to commit our api key into version control – if we were to deploy it to production, injecting sensitive data from a Key Vault during the CI/CD pipeline would have been an option.
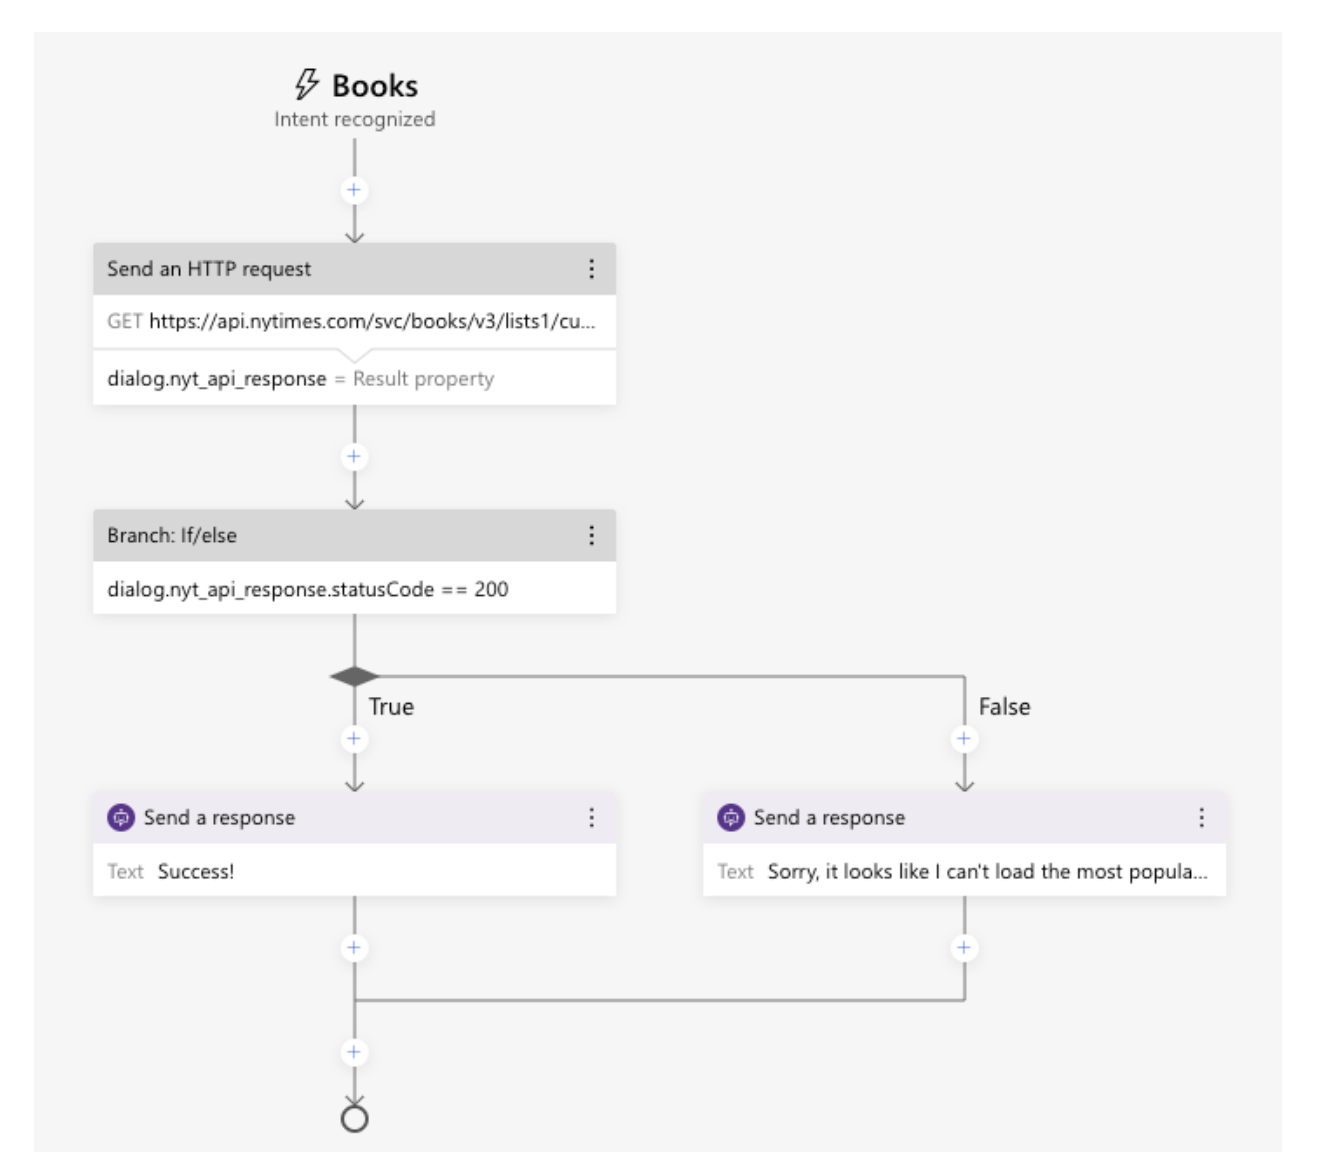
After we fill the HTTP method, URL and necessary headers, we will have to store the result of the call in a variable to access in the following steps – for this, we can create a new variable on our dialog, dialog.nyt_api_response.
As the HTTP request either failed or succeeded, we’ll put an If block after our Send HTTP request step. In it, we’ll check the status code: dialog.nyt_api_response.statusCode == 200. For both true and false cases, a Send response block is placed to reply back to the user. At the moment, our action should look as follows:
After validating that everything is working as expected, we can start processing the result of the successful call. First of all, we’ll need only the title and author of the response, therefore we’ll use the select built-in function (splitted for better readability):
${select(
    dialog.nyt_api_response.content.results.books,
    book,
    book.title
}
This would be the equivalent in LINQ of:
dialog.nyt_api_response.content.results.books.select(book => book.title);Since we’d like to display the authors as well, instead of just returning book.title, we’ll return:
book.title + ' ' + book.contributorWe don’t want to overwhelm the user with a long string, therefore we can wrap the select in a take function, specifying how many items to include in our result:
${take(
    select(
        dialog.nyt_api_response.content.results.books,
        book,
        book.title + ' ' + book.contributor)
    , 5)}
Since take returns an array, we’ll need to concatenate the items into a single string: we’ll use the join function:
${join(
    take(
        select(
            dialog.nyt_api_response.content.results.books,
            book,
            book.title + ' ' + book.contributor)
        , 5),
    ', ')}
At the end, this would be equivalent in LINQ to:
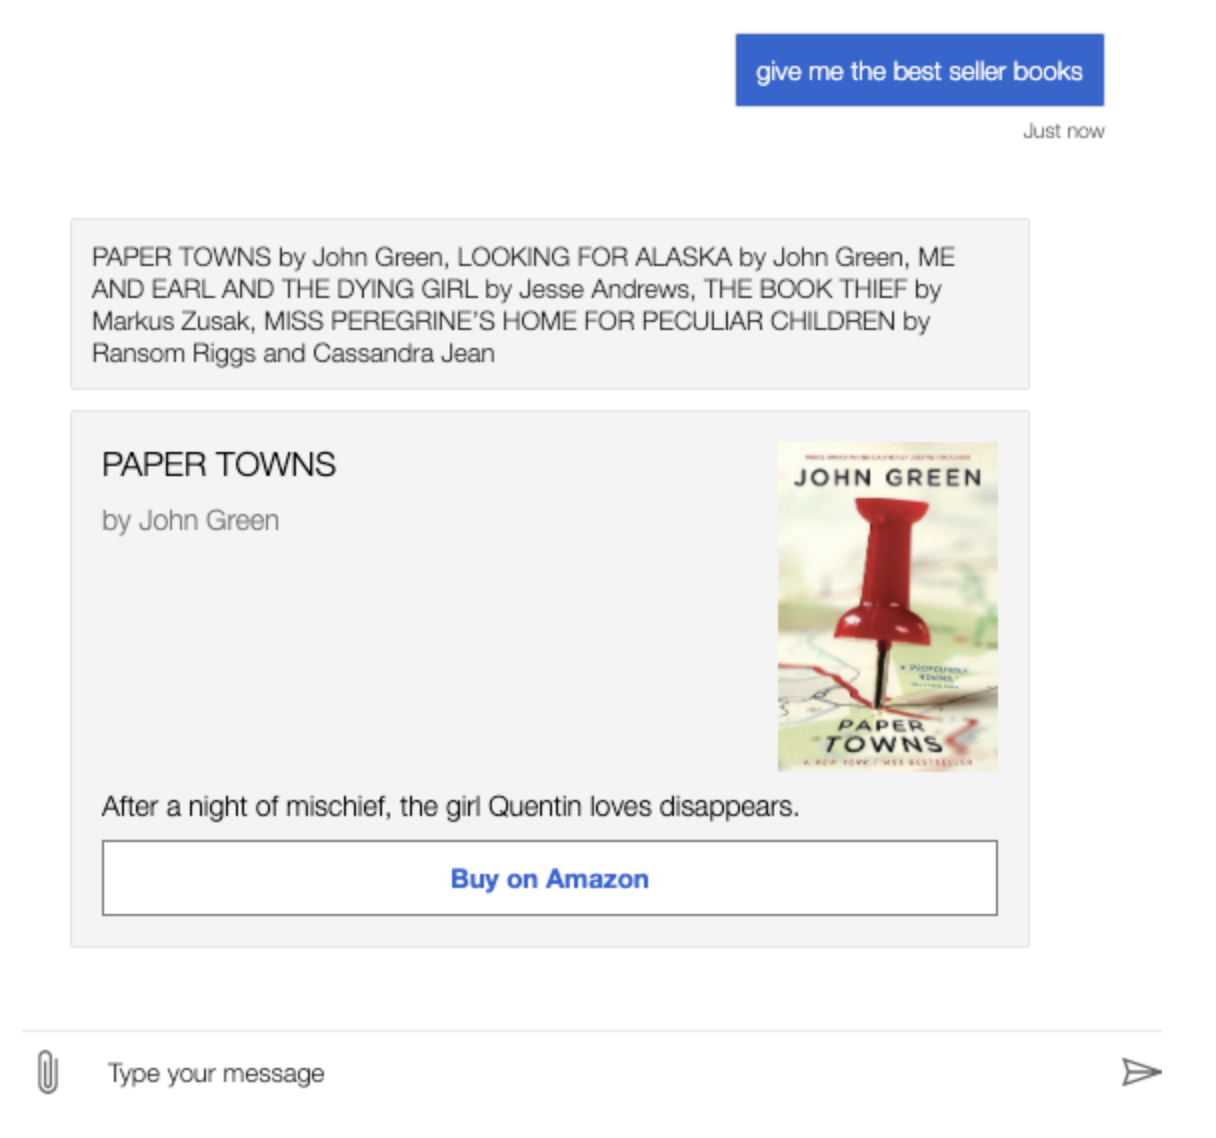
string.Join(‘, ‘, dialog.nyt_api_response.content.results.books.select(book => book.title + ' ' + book.contributor).take(5))Since we already know how to attach a card to our response, we can prompt the user with the Amazon link to the #1 best seller as well:
[ThumbnailCard
 title = ${dialog.nyt_api_response.content.results.books[0].title}
 subtitle = ${dialog.nyt_api_response.content.results.books[0].contributor}
 text = ${dialog.nyt_api_response.content.results.books[0].description}
 image = ${dialog.nyt_api_response.content.results.books[0].book_image}
 buttons = ${cardActionTemplate('Buy on Amazon', dialog.nyt_api_response.content.results.books[0].amazon_product_url)}
]
Where cardActionTemplate is defined as a template under Bot Responses:
[CardAction
title = ${title}
type = 'link'
value = ${value}
]
Finally, we ended up with the following response, with a working button:
Deploying our Bot, integrating with React
We can initiate the deployment of our Bot to Azure from within the Composer’s Publish option. We can either create new resources, use existing ones, or generate a request which we can forward to someone who has access to provision the resources, should we happen to have limited roles.
For our simple Bot, only an App Registration, Azure Service Web Apps for hosting and a Microsoft Bot Channels Registration will be necessary. After a few minutes, the resources are deployed and we can confirm our intention to push our Bot’s source to the cloud.
As of July 2nd, 2021, integrating the deployment within a CI/CD pipeline in Azure DevOps is in Preview, therefore not yet ready for production. Nevertheless, the steps in the pipeline would be recognizable to someone who has ever created a pipeline for .NET web applications (dotnet build, publish and AzureWebApp tasks).
After the deployment is completed, we can integrate the Bot to, for example, our existing React app, via the Web Chat’s botframework-webchat npm package. In order to authenticate with our Bot, only a simple token will be necessary, which we can generate ourselves directly on the Azure Portal from the deployed Web App Bot’s Channels menu.
Further reading, references:
Complete full list of prebuilt functions
Author
-

Full stack developer, with 6+ years of experience, building back-, and frontends with various technologies, designing and developing scalable infrastructures on Microsoft Azure.
View all posts

